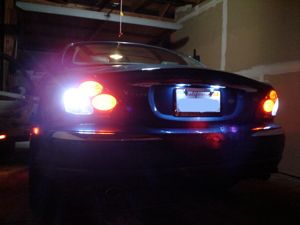
The purpose of this checklist is the describe the operation of the marker and park lamp circuit and provide a diagnostic checklist for troubleshooting. This information applies specifically to North American models and does not take into account various world market variations.
Circuit Description
The circuit is comprised of ten lamps, five fuses, and five bulb check units. The front marker and park lamps are protected by fuses #14 and #15 in the auxiliary fuse box. The two bulb check units for these front lamps are mounted on the right side component panel, a few inches to the right of the aux fuse box. The tail lamps, marker lamps, and license lamps are protected by three inline fuse mounted in the boot on the forward bulkhead, as are the three bulb check units for those lamps.
The bulb check units each have a bi-metal switch inside. In essence, heat from the normal load of the circuit opens the switch. If a bulb fails, the load/heat of the circuit is reduced, and allows the switch to close, thus completing a circuit to the dashboard mounted warning light.
Diagnostic Checklist
This circuit is easy to diagnose with a 12 volt test lamp. However, it is important to know the grouping of circuits and lamps so you'll know how much to check. For example, if the right rear tail lamp and the right license lamp are both inoperative it is important to know that they are on separate circuits. Here's the grouping, and each group has it's own fuse and check unit.
- L/F marker and L/F park lamp
- R/F marker and R/F park lamp
- L/R tail lamp and R/license
- L/R marker and R/R marker
- R/R tail lamp and L/license
All of the above EXCEPT L/license and R/tail lamp receive voltage from the same source....red/slate wire at the lighting switch. If all of these lamps are inoperative then you can expect a problem well "upstream". The L/license and R/tail lamp receive voltage from the red/orange wire at the lighting switch.
So, if one bulb within a group works it is safe to assume the the circuit is operational and the fault is with the bulb, socket, or wiring to that specific bulb. For example, if the right rear tail lamp works OK but the left license lamp does not, then you know that the power supply, fuse and bulb check unit for that group are OK and you can isolate the fault to the license bulb, socket, or wiring. Also remember to check the ground points....in each case easily tracable from the lamp....and ground wires, which are always black. You are looking for clean, tight connections.
Speaking of connections, these circuits are full of bullet connectors which are prone to loosening and corrosion and are quite often the culprits when a lamp isn't working. If single lamps are acting up and you have known good bulbs, make sure to check, clean, and tighten your connectors. Bulb sockets, too, tend to gather dirt and corrosion. A good elctrical cleaning aerosol can be used or, after pulling the correct fuse, use some WD40 and steel wool....if your fingers are small enough ! In either case follow up with some dielectric grease or a dab of light oil for future protection.
If both bulbs within a group are inop then you'll want to check the fuse for that group. It is often advised that fuses be summarily replaced as a fuse which appears good may actually be open or intermittant. Of course, you'll check that the contacts for the fuses are clean and secure.
Circuit Testing
OK, assuming known good bulbs, good fuses, secure grounds, and clean connectors we'll delve into some easy circuit testing.
- Using your 12 volt test light, check the heavy brown wire at the light switch. It should have 12 volts at all times as it is direct battery feed from the left firewall junction post.
- With the switch "on", check that the red/slate wire and the red/orange wire have voltage. If no voltage here then there is an internal fault in the switch. If voltage is Ok at these wires.....
- Check for voltage at each of the bulb check units where the red/slate wire enters (or red/orange in the case of the L/license and right tail lamp). If voltage is not present at the check units then you have a wiring or connector fault between the switch and the check unit. If voltage is present at this point.....
- Check for voltage exiting the check units on the red wires. If no voltage on a red wire then the bulb check unit is "open" and needs replacement. If voltage is exiting the check unit OK, then....
- Check for voltage to the fuses, also on red wires. If no voltage to the fuse then you have a wiring fault between the fuse and the check unit. If voltage is present at both sides of the fuse but the lamp still does not operate then you have a wiring or connector fault between the fuse and the lamp.
Incidentally, you'll notice that each bulb check unit has a white/slate wire. This wire on each unit goes the the bulb failure warning lamp and should have voltage only if a bulb is burned out.
See how easy ? Still believe there is mystery to Jag electrics ? Nah.


No comments have been posted yet...
Want to leave a comment or ask the owner a question?
Sign in or register a new account — it's free